Real Estate Photography Checklist for Sellers and Agents
A successful property photoshoot starts before the photographer opens a camera bag. Someone needs to confirm access, decide which features deserve attention, prepare the rooms, and explain how the finished images will be used. Without that coordination, even an attractive home can end up with an incomplete or inconsistent listing gallery.
A real estate photography checklist connects those decisions. It gives agents, homeowners, and photographers a shared plan for preparation, image coverage, and final approval.
This guide follows the entire assignment, from the initial brief to the moment the photographs appear online. Whether you are organizing your first listing or managing several properties, you can adapt the checklist to the home instead of treating every appointment as the same job.
What Is Real Estate Photography?
Real estate photography is the creation of property images for marketing homes, buildings, and other spaces for sale or rent. Its purpose is to help prospective buyers or tenants understand what a property looks like, how its spaces connect, and which features deserve closer consideration.
Strong listing images balance visual appeal with an accurate representation of the property. A bright photograph is useful only if the room still looks believable. A wide view should explain the layout without making furniture, doorways, or room proportions appear distorted.
Browse the TourDSpace real estate photography portfolio to see examples of interiors, exteriors, and property presentations across different markets.
Your Real Estate Photography Checklist at a Glance
Before working through individual rooms, organize the assignment into five stages:
- Confirm the property, appointment, access arrangements, and marketing goals.
- Prepare the home and identify anything that needs attention before arrival.
- Agree on essential rooms, features, and additional media.
- Check coverage and image quality before the photographer leaves.
- Review the delivered files, captions, and gallery order before publishing.
Keep this real estate photography checklist with the booking information. Each unfinished item should have a named owner and a deadline. “Kitchen needs preparation” is vague; “seller clears countertops before Tuesday’s appointment” creates a usable instruction.
The same approach helps separate essential work from optional improvements. A missing access code can stop the appointment. An additional decorative pillow usually cannot.
1. Create a Real Estate Photography Client Checklist
A real estate photography client checklist should explain the assignment before anyone starts discussing camera angles.
Record the property address, property type, approximate size, occupancy status, and listing launch date. Identify the person who can approve changes and the person who will provide access. Those may be different people, especially when a seller, tenant, property manager, and listing agent are involved.
Also confirm:
- Which rooms, buildings, and outdoor areas are included.
- Whether there are separate units or locked spaces.
- Where equipment can be unloaded and parked.
- Whether cleaning, staging, or other appointments will be finished.
- Which features the agent considers essential.
- Whether photographs are needed for listing portals, print materials, social media, or all three.
- Who will review the completed gallery.
Booking guidance from PicAppoint similarly emphasizes defining the property, launch schedule, access, and media needs before the shoot. PicAppoint
Add one further question to your brief: “What would make this gallery incomplete?” An answer such as “missing the detached studio” is more useful than a general request to make the property look impressive.
2. Set Clear Real Estate Photography Requirements
The real estate photography requirements for an assignment should cover both the appointment and the delivery.
Agree on the expected scope rather than assuming that every package includes the same image count, editing, or additional services. Ask how changes are handled if the property is larger than described, a room is inaccessible, or the home is not ready.
For delivery, clarify the intended publishing channels, required file versions, expected turnaround, revision process, and permitted uses. Ask the listing agent to confirm the current upload specifications of the relevant platform instead of relying on a universal image size.
Your real estate photography checklist should also identify the final reviewer. When several people send separate editing instructions, small disagreements can become repeated revisions. One consolidated feedback message makes it easier to distinguish an actual correction from a new request.
3. Complete a Home Photography Preparation Checklist
A home photography preparation checklist should help the seller finish practical work before the appointment. The photographer should be able to concentrate on capturing the property rather than waiting while belongings move from room to room.
Begin with visible surfaces, circulation routes, and reflective materials. Clean windows and mirrors, remove loose paperwork, organize furniture, and put away personal items that should not appear online. Make beds, clear bathroom surfaces, and remove unnecessary objects from kitchen counters.
Room preparation guidance commonly highlights these small distractions because they remain visible in otherwise strong photographs. OpenDoors360
For a more detailed seller-focused walkthrough, use our guide on how to prepare a home for real estate photography.
The preparation section of your real estate photography checklist should include a final readiness check by the agent or homeowner. Do not assume that sending instructions means every task has been completed.
Exterior Readiness
Move vehicles where they will not dominate the intended exterior views. Put away portable bins, garden tools, toys, and loose equipment. Straighten patio furniture and check that entrances and paths are accessible.
Discuss weather-sensitive features in advance. If a pool, outdoor kitchen, landscaped terrace, or mountain-facing balcony is important to the listing, the photographer should know before planning the appointment.
Interior Readiness
Prepare all included rooms before photography begins. Avoid using the next room on the shot list as a temporary storage area.
Check visible documents, computer screens, mirrors, and framed personal photographs. Decide where occupants and pets will stay during the session so they do not repeatedly interrupt the photographer’s route.
4. Build a Room-by-Room Listing Photo Checklist
A listing photo checklist should describe what each image needs to communicate. Instead of requesting several photographs of every room automatically, identify the views that explain the space and its relationship to the rest of the home.
The following is a planning framework, not a fixed image-count package:
| Space | What the photographs should explain | Additional view to consider |
|---|---|---|
| Front exterior | Appearance, entrance, and approach | An angle showing depth or driveway access |
| Living area | Main seating space and room proportions | Connection to dining, kitchen, or outdoor space |
| Kitchen | Working layout, cabinetry, and counters | Island, pantry, or adjoining breakfast area |
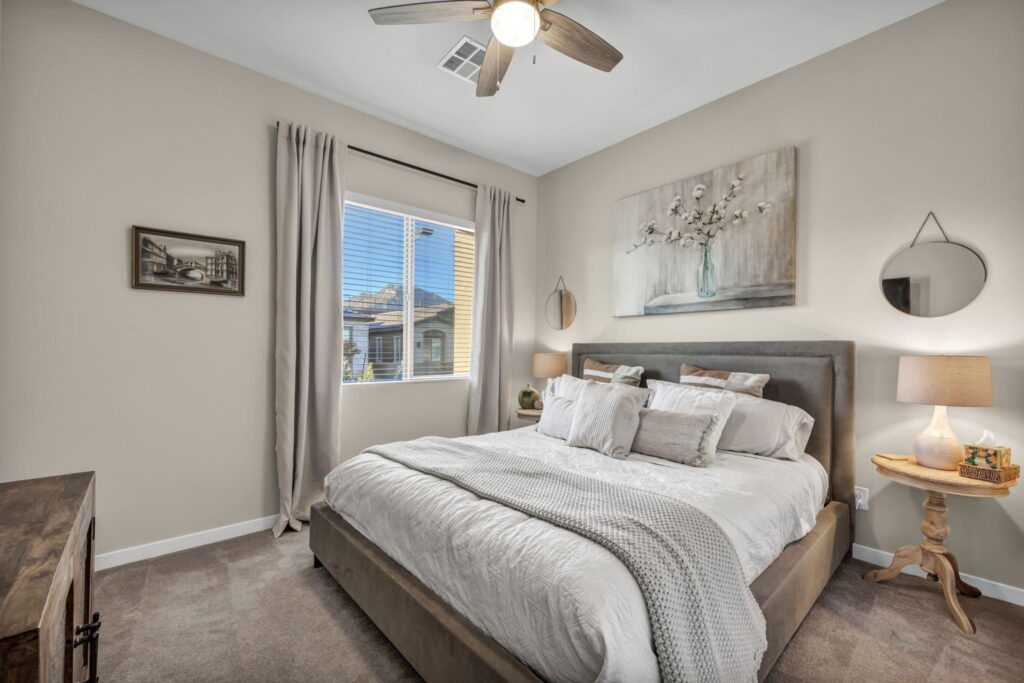
| Primary bedroom | Usable floor space and window placement | Connection to an ensuite or private outdoor area |
| Bathrooms | Fixtures and overall arrangement | A distinctive shower, bathtub, or vanity |
| Secondary rooms | Size, layout, and potential function | A feature not visible in the main view |
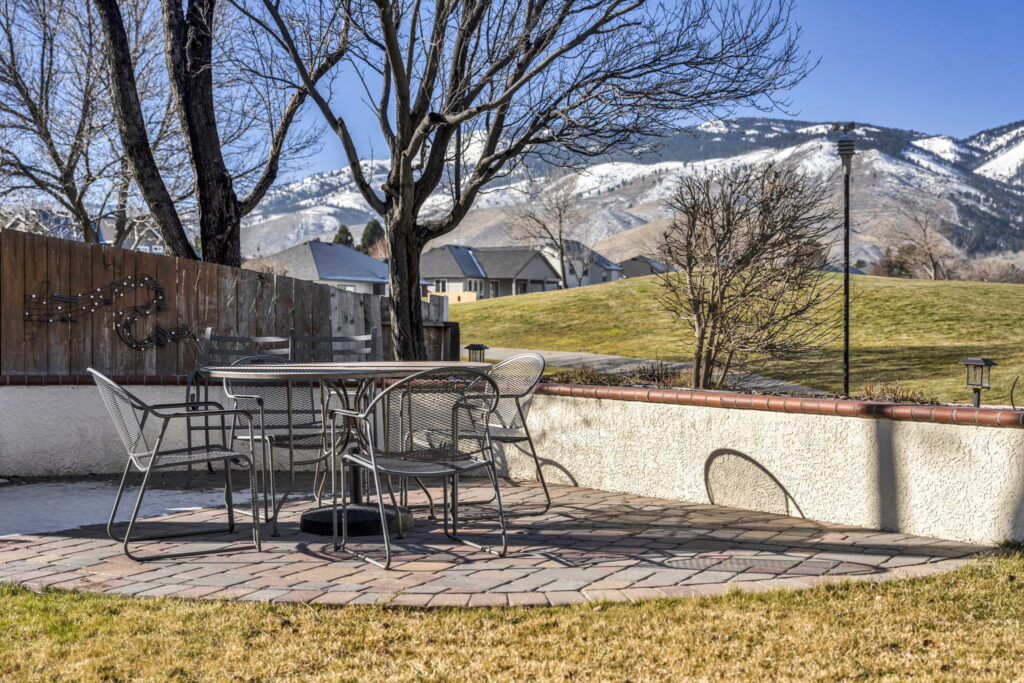
| Outdoor living | Patio, yard, deck, or balcony arrangement | Connection back to the home |
| Additional structures | Function and relationship to the property | Interior coverage if included in the brief |
This real estate photography checklist should remain flexible. A compact condominium and a property with a guesthouse need different coverage.
A useful principle from shot-list guidance is that additional angles should contribute new information rather than repeat what buyers have already seen. Relight Spaces
5. Plan Lighting Around the Property
There is no single appointment time that produces the best result for every home. The position of the building, surrounding structures, window orientation, and important views all influence the lighting plan.
Tell the photographer if the front entrance sits in deep shade, a main living area receives strong afternoon sunlight, or a particular view matters to the marketing. These details can affect which spaces should be photographed first.
Discuss the use of interior lights rather than making assumptions. The photographer may need to manage different light colors and brightness levels across the property.
For evening coverage, add a separate lighting check to your real estate photography checklist. Confirm which interior and exterior fixtures work and who can operate them. Explore real estate twilight photography when illuminated architecture or outdoor living areas are important to the presentation.
Our article on twilight real estate photography in Cleveland provides further context for properties with patios, landscaping, and exterior lighting.
6. What Equipment Do I Need for Real Estate Photography?
If you are asking, “What equipment do I need for real estate photography?” start with the work you need to deliver rather than a list of expensive products.
A practical equipment plan includes a camera with suitable exposure control, a lens appropriate for interiors, stable camera support, charged batteries, sufficient storage, and an editing workflow. Additional lighting may be useful depending on the property and the photographer’s technique.
A tripod and a suitable wide-angle lens are common parts of property photography workflows, but equipment alone does not determine the quality of a listing gallery. Composition and an accurate sense of space remain important. Zillow
For the photographer, the equipment section of a real estate photography checklist should confirm readiness: clean lenses, available storage, working controls, and a plan for backing up files.
For the client, the more useful question is whether the photographer can deliver consistent work in conditions similar to the property being marketed.
7. How to Do Real Estate Photography with a Clear Capture Plan
Learning how to do real estate photography involves more than finding a wide camera angle. It requires turning a physical walkthrough into a sequence of useful photographs.
Begin by identifying the main spaces and the route between them. Then decide which views explain those connections without forcing every room into one image.
Before leaving each space, check the frame for distractions, reflections, awkward cropping, and missing features. Review whether the photograph communicates the room’s function and whether a second view adds something valuable.
Use the real estate photography checklist as a coverage record during the session. Mark a room complete only after reviewing the capture, not simply after pressing the shutter.
When a property has an unusual layout, photographs may need additional context. Real estate floor plan services can help viewers connect individual room images to the overall arrangement.
For example, a photograph may show an attractive upstairs landing without explaining where the bedrooms sit. A floor plan can answer that different question without requiring several repetitive hallway images.
8. Add Video, Aerial Images, and Tours with a Specific Purpose
Additional media should solve a presentation problem. Decide what buyers need to understand before adding services to the booking.
Property Video
Video can introduce a property through a planned visual sequence. If you want real estate videography, discuss the intended audience, important spaces, and whether different versions are needed for different marketing channels.
Include preparation for video in the real estate photography checklist. A room that works from one still-camera position may reveal clutter when the camera moves through it.
Aerial Photography
Aerial imagery can add context when outdoor space, surrounding scenery, or the relationship between buildings matters. Discuss the intended views with the provider and confirm whether aerial capture is feasible for the location and appointment.
Explore drone real estate photography for suitable properties. Our article on the role of drone photography in Reno real estate listings explains the value of broader location and landscape views.
Interactive Tours
An interactive tour serves a different purpose from a finished video. Viewers can choose where to look and revisit spaces at their own pace.
With Matterport 3D virtual tours, prepare all included areas and keep pathways clear. Confirm the planned coverage and hosting arrangements when booking; do not assume that every tour format or platform is included.
9. Use Editing to Improve Clarity and Preserve Accuracy
Editing should produce a coherent gallery without creating a misleading version of the home. Review images for consistent brightness, believable color, clean composition, and accurate permanent features.
Some clients use the phrase “real estate photoshop design” when requesting anything from image corrections to digitally furnished rooms. That phrase is too broad for a production brief. Explain whether you want photographic adjustments, virtual staging, a promotional graphic, or a renovation concept.
These are different deliverables and should be discussed separately.
For empty rooms, virtual staging services can illustrate a possible furniture arrangement. Keep the original photographs available and clearly identify the staged versions. Furniture concepts should not suggest that permanent elements or the property’s condition have changed.
The editing section of your real estate photography checklist should identify who approves these changes and how staged images will be distinguished from unaltered room views. For additional examples of where digital furnishing can help, read virtual staging for Cleveland real estate listings.
10. Use Pinterest References as a Brief, Not a Blueprint
A search such as “real estate photos Pinterest” can help you collect visual references, but a reference board is most useful when it explains a preference.
Write a short note beside each example. Do you like the restrained color, the way the room connects to the garden, or the balance between wide views and architectural details?
Avoid asking the photographer to reproduce a composition that depends on a different building, ceiling height, window position, or renovation budget. The purpose of the reference is to communicate direction for the actual property.
Keep the board small enough to review during planning. A few relevant examples with clear notes are more actionable than dozens of unrelated interiors.
11. Review the Gallery Before It Goes Live
The real estate photography checklist is not finished when the files arrive. Open the delivery on a larger screen and review the complete set before uploading it.
Check that each image belongs to the correct property and that the agreed areas are represented. Compare the gallery with the original brief: is the detached office included, is the balcony view clear, and are any promised amenities missing?
Then review the sequence. Choose an opening photograph that represents the listing well, followed by images that help viewers understand the main living spaces. Avoid placing several nearly identical frames next to one another.
Also confirm:
- The correct files are being used for each publishing channel.
- Images have not been accidentally stretched or heavily cropped.
- Captions describe the correct spaces.
- Staged or conceptual images are clearly identified.
- Private information is not visible.
- The reviewer has approved the final selection.
Make any correction request specific. “Image 12 shows a different room label” is easier to resolve than “the gallery needs work.”
A Real Estate Photography Checklist Template You Can Reuse
Copy this real estate photography checklist template into your listing notes or project sheet. Add an owner and completion date for each unfinished task.
| Stage | Check | Responsible person | Status |
|---|---|---|---|
| Brief | Property details and included areas confirmed | Agent | ☐ |
| Brief | Listing launch date and delivery needs agreed | Agent and photographer | ☐ |
| Access | Entry, parking, contact, and lock-up instructions confirmed | Agent or owner | ☐ |
| Preparation | Cleaning and any physical staging completed | Owner or staging team | ☐ |
| Preparation | Personal items and sensitive documents removed | Owner | ☐ |
| Preparation | Included rooms and outdoor areas ready | Owner and agent | ☐ |
| Coverage | Essential rooms and distinctive features listed | Agent and photographer | ☐ |
| Media | Video, aerial, tour, or twilight needs discussed | Agent and photographer | ☐ |
| Capture | Agreed coverage checked before departure | Photographer | ☐ |
| Editing | Special editing and staging requests documented | Agent and editor | ☐ |
| Delivery | Files checked against the assignment brief | Agent | ☐ |
| Publishing | Gallery order, captions, and image labels reviewed | Agent | ☐ |
Use the template as a handoff document. If an item remains incomplete, record its effect on the appointment rather than quietly assuming someone else will resolve it.
Frequently Asked Questions
What should a real estate photography checklist include?
It should cover the assignment brief, access arrangements, preparation, essential photographs, additional media, and final review. Include responsibilities and deadlines so the checklist supports coordination rather than functioning only as a reminder.
How many photographs does a listing need?
The appropriate number depends on the property, agreed package, and publishing platform. Aim for enough coverage to explain the home without excessive repetition. Confirm the image count with the photographer and review whether important spaces are represented.
Should the homeowner stay during the photoshoot?
Agree on this before the appointment. Some sessions are easier when occupants leave temporarily, while others require an owner or agent to provide access. If someone stays, establish where they can remain without interrupting the planned coverage.
Do I need every room photographed?
Discuss the scope with the agent and photographer. Main living areas and relevant features generally deserve attention, but the decision should reflect the property and marketing brief. Do not discover after delivery that a room was excluded because nobody mentioned it.
What are the main real estate photographer requirements?
From a client’s perspective, real estate photographer requirements include relevant portfolio work, clear communication, reliable scheduling, consistent image quality, and defined delivery terms. Ask about experience with comparable properties and confirm any specialist services separately.
How do I get started in real estate photography?
If you are asking, “How do I get started in real estate photography?” practice photographing properties you have permission to access, review the results critically, and learn a repeatable capture-to-delivery workflow. Develop a portfolio that demonstrates complete room coverage rather than relying only on a few attractive individual images.
Can editing replace property preparation?
Editing can improve a photograph, but it should not be assumed to include extensive clutter removal or changes to permanent features. Prepare the property first and agree on editing scope in advance. This also helps keep still images, videos, and interactive tours consistent.
Is a checklist still useful when hiring a professional?
Yes. The photographer brings production expertise, but the client usually knows the access arrangements, launch schedule, property history, and marketing priorities. A shared checklist connects that information with the photographer’s workflow.
Plan Your Next Property Photoshoot with TourDSpace
A real estate photography checklist works best when it helps people make decisions early. Confirm the brief, prepare the property, identify the necessary views, and leave time to review the finished gallery before launch.
TourDSpace Productions is a Nevada-based photography and videography production company serving Cleveland, Ohio; Reno–Tahoe and Las Vegas, Nevada; Sacramento, California; Pittsburgh, Pennsylvania; and Denver, Colorado.
Share your property location, intended listing date, and media priorities through Contact TourDSpace to discuss availability and the appropriate scope for your project.
Las Vegas office: 10175 Spring Mountain Road #1038, Las Vegas, NV 89117.